Dimensional Tolerances
| Property | Tolerance | ||
|---|---|---|---|
| Profile height and width of flange | |||
 |
Nominal dimensions (mm)
|
||
| Diametre of Rods and Tubes |
|||
 |
D, d (mm) 0 – 10 |
D ± 0,20 |
d ± 0,20 |
| Wall-thickness of open and closed profiles |
Nominal dimensions (mm) | ||
 |
Thickness 0 – 2 |
T1 ± 0,15 |
T2 ± 0,30 |
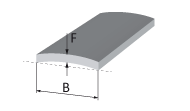
| Flatness in transverse direction | |||
 |
Tolerance F < 0,008 X B mm |
||
| Size of angle | |||
 |
Tolerance Y ± 1,5° |
||
| Straightness | |||
 |
Tolerance (B and H are overall
|
||
| Twist | |||
 |
Tolerance
|
||
| Length of cut | |||
 |
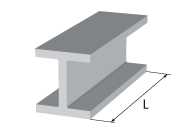
L + 20 / – 0 mm | ||
| Angularity of cut | |||
 |
V ± 1,5° | ||
This post is also available in: Norskt Bokmål Engelska
